Showing posts with label kinect. Show all posts

Sunday, March 9, 2014

The Human Triangulation Experiment, Stage 1

    Recently, us lucky saps in the Perceptual Computing Lab have been fortunate enough to be doing some prototypes for different external groups, and I've actually been lucky enough to work with one of my favorite groups, [REDACTED]!  Needless to say, I'm super excited, and one of the first projects I'm working on involves using depth data and object/user segmentation data to interact with virtual/digital content, much like the ever popular kinect/box2d experiments you've probably seen floating around...


Check out more of Stephen's stuff on github or on his website.

    Depth buffer, OpenCV, cinder::Triangulator, and Box2D, seemed pretty straightforward, I mean let's be honest, that's creative coding 101, right?  That's what I thought, but as usual, the devil's in the details, and after some (not terribly extensive) searching and a little bit more coding I had...eh, well...nothing.  My code looked correct, but no meshes were drawn that day, and even in a cursory inspection of my TriMesh2ds, there was nary a vertex to be seen.  Here's what I tried originally (this is sketch code, so yeah, the pattern is a little sloppy):

//cv contours are in mContours, mMeshes is vector<TriMesh2d>
for(auto vit=mContours.begin();vit!=mCountours.end();++vit)
{
  Shape2d cShape;
  vector<cv::Point> contour = *vit;
  auto pit=contour.begin();
  cShape.moveTo(pit->x,pit->y); ++pit;
  for(/* nothing to see here */;pit!=contour.end();++pit)
  {
    cShape.lineTo(pit->x, pit->y);
    cShape.moveTo(pit->x, pit->y);
  }
  cShape.close;
  Triangulator tris(cShape);
  mMeshes.push_back(tris.calcMesh());
}

    Right, so at this point, it should be a simple exercise in gl::draw()ing the contents of mMeshes, yeah?  Sadly, this method yields no trimesh for you!, and as I mentioned above, even a quick call to getNumVertices() revealed that there were, in fact, no vertices for you!, either.  The docs on Triangulator lead me to believe that you can just call the constructor with a Shape2d and you should be good to go, and a quick test reveals that constructing a Triangulator with other objects does in fact yield all the verts you could ever want, so methinks maybe it's an issue with the Shape2d implementation, or perhaps I'm building my Shape2d wrong.  I rule the latter out, though (well, not decisively), since Triangulator has the concept of invalid inputs, e.g. if you don't close() your Shape2d, the constructor throws, so...what to do, what to do?  To the SampleCave!


TRIANGULATE AGAIN, ONE YEAR! NEXT!

    Mike Bostock, he of d3.js fame gave a great talk at eyeo festival last year on the importance of good examples (Watch it on Vimeo), and you know, it's so true.  It's sorta like documentation, we employ technical writers for that sorta thing, I feel like we should at least give some folks a solid contract to put together good sample code for whatever we're foisting onto the world, rather than relegating samples to free time and interns (no offense to either free time or interns).  Now Cinder has amazing sample code, so a quick google search for TriMesh2d popped up the PolygonBoolean sample, which was basically doing what I wanted, i.e. constructing and drawing a TriMesh2d from a Shape2d...kinda.  I trust the good folks at Team Cinder to not ship sample code that doesn't work, so a quick build 'n' run later and I had a solution.  I was sooooo close...

//cv contours are in mContours, mMeshes is vector<TriMesh2d>
for(auto vit=mContours.begin();vit!=mCountours.end();++vit)
{
  PolyLine2f cShape;
  vector<cv::Point> contour = *vit;
  for(auto pit=contour.begin();pit!=contour.end();++pit)
  {
    cShape.push_back(fromOcv(*pit));
  }
  Triangulator tris(cShape);
  mMeshes.push_back(tris.calcMesh());
}

    The results?  Well, see for yourself:


My tribute to Harold Ramis, may you never end up in one of your own traps, sir.

    Next steps are to maybe run some reduction/smoothing on the contours, although I suppose it doesn't matter terribly for this prototype, and get it into Box2D, all of which I'll cover in Stage 2, including a quick 'n' dirty Cinder-based Box2D debug draw class.  This is awesome, it's total Tron stuff, bringing the real into the digital and all that sort of sorcery.  Once I get the Box2D stuff implemented, I'll stick a project up on github, until then, if you have specific questions, Tag The Inbox or leave a comment below, you are always welcome to try my Shogun Style...for reference, here's the complete update() and draw():

//Using Cinder-OpenCV and Intel Perceptual Computing SDK 2013
void segcvtestApp::update()
{
  mContours.clear();
  mMeshes.clear();
  if(mPXC.AcquireFrame(true))
  {
    PXCImage *rgbImg = mPXC.QueryImage(PXCImage::IMAGE_TYPE_COLOR);
    PXCImage *segImg = mPXC.QuerySegmentationImage();
    PXCImage::ImageData rgbData, segData;
    if(rgbImg->AcquireAccess(PXCImage::ACCESS_READ, &rgbData)>=PXC_STATUS_NO_ERROR)
    {
      mRGB=gl::Texture(rgbData.planes[0],GL_BGR,640,480);
      rgbImg->ReleaseAccess(&rgbData);
    }
    if(segImg->AcquireAccess(PXCImage::ACCESS_READ, &segData)>=PXC_STATUS_NO_ERROR)
    {
      mSeg=gl::Texture(segData.planes[0],GL_LUMINANCE,320,240);
      segImg->ReleaseAccess(&segData);
    }

    mSrcSurf = Surface(mSeg);
    ip::resize(mSrcSurf, &mDstSurf);
    mPXC.ReleaseFrame();
  }

  cv::Mat surfMat(toOcv(mDstSurf.getChannelRed()));
  cv::findContours(surfMat, mContours, CV_RETR_LIST, CV_CHAIN_APPROX_SIMPLE);

  for(auto vit=mContours.begin();vit!=mContours.end();++vit)
  {
    PolyLine2f cLine;
    vector<cv::Point> contour = *vit;

    for(auto pit=contour.begin();pit!=contour.end();++pit)
    {
      cLine.push_back(fromOcv(*pit));
    }

    Triangulator tris(cLine);
    mMeshes.push_back(tris.calcMesh());
  }
}

void segcvtestApp::draw()
{
  // draw camera feed
  gl::clear(Color( 0, 0, 0 ) );
  gl::color(Color::white());
  gl::draw(mRGB, Vec2f::zero());

  //draw meshes
  gl::enableWireframe();
  gl::color(Color(0,1,0));
  for(auto mit=mMeshes.begin();mit!=mMeshes.end();++mit)
  {
    gl::draw(*mit);
  }
  gl::disableWireframe();
}

Sunday, March 31, 2013

[TUTORIAL] Visualizing Depth in Unity, part 2

    The joys of having a laptop capable of development, I'm seriously in love with my Ultrabook.  This isn't just me shilling for the company, I'm totally sold on this thing.  Apple did right by forcing people to figure out how to build smaller, lighter laptops that still pack serious development punch.  For reference, I'm currently working off of a Gigabyte U2442, would be nice to get something that has a Core i7 CPU, but this one's a Core i5 at 3.1 with a mobile Geforce 6xx, so I'm happy with it.  Made it easy for me to bang out this second depth sample from the comfort of a...actually I think it was a bar as opposed to a coffee shop...


The Technolust, i sorta haz it...

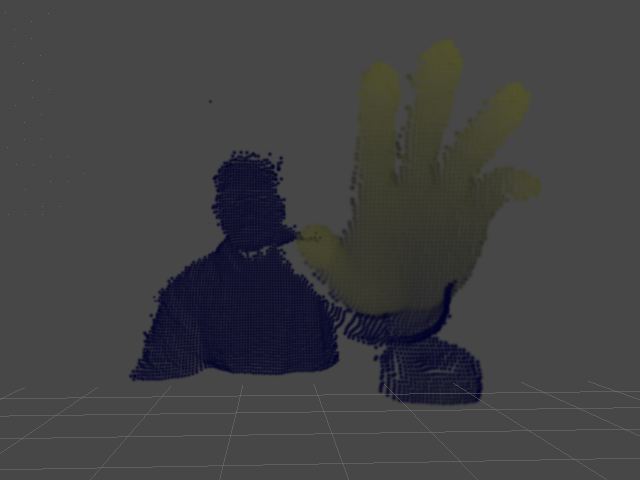
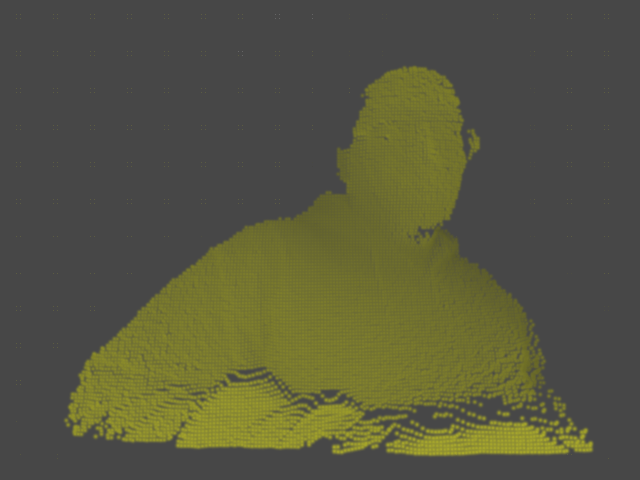
    I mentioned in my last post I'd been messing around with some other methods for visualizing depth from the Creative Camera, I took a few moments after GDC to decompress and finish this one up, it sorta builds off the last sample.  Instead of visualizing a texture, I'm using the depth to set attributes on some particles to get that point cloudy effect that everyone seems to know and love.  This one's a bit more complex, mainly because I added a few parameters to tweak the visualization, but if you've got some Unity under your belt, none of this will be that tricky, and in fact, you'll probably see pretty quickly how setting particle data is very similar to setting pixel data.  I should also note that the technique presented here could apply to any sort of 3d camera, pretty much if you can get an array of depth values from your input device, you can make this work.  So here's what we're trying to accomplish when all's said and coded:


    Since this is a Unity project, we'll need to set up a scene first.  All that's required for this is a particle system, which you can create from the GameObject menu (GameObject > Create Other > Particle System).  Set the particle system's transforms (translate and rotate) to 0,0,0 and uncheck all the options except for Renderer.  Next, set the Main Camera's transform to 160,120,-240, and our scene is ready to go.  That all in place, we can get to coding.  We'll only need a single behavior for this test, which we'll put on the particle system.  I called mine PDepth, but you'll call it Delicious (or whatever else suits your fancy)!  First, let's set up our particle grid and visualization controls:

//We'll use these to control our particle system
public float MaxPointSize;
public int XRes, YRes;

private ParticleSystem.Particle[] points;
private int mXStep, mYStep;

  • MaxPointSize: This controls the size of our particles
  • XRes, YRes: These control the number of particles in our grid
  • points: This container holds our individual particle objects
  • mXStep, mYStep: These control the spacing between particles (this is calculated, not set manually)

    With those in place, we can populate our particle grid and get some stuff on screen.  Here's what our initial Start() and Update() methods should look like:

void Start()
{
    points = new ParticleSystem.Particle[XRes*YRes];
    mXStep = 320/XRes;
    mYStep = 240/YRes;

    int pid=0;
    for(int y=0;y<240;y+=mYStep)
    {
        for(int x=0;x<320;x+=mXStep)
        {
            points[pid].position = new Vector3(x,y,0);
            points[pid].color = Color.white;
            points[pid].size = MaxPointSize;
            ++pid;
        }
    }
}

void Update()
{
    particleSystem.SetParticles(points, points.Length);
}

    If you're wondering where the values 320 and 240 came from, we're making some assumptions about the size of our depth map to set the initial bounds.  Once we add in the actual depth query, we'll fix that and not have to rely on hardcodes.  Otherwise, if all went according to plan, we should have a pretty grid of white particles.  Be sure to set some values for XRes, YRes, and MaxPointSize in the Inspector!  For this example, I've used the following settings:
  • XRes: 160
  • YRes: 120
  • MaxPointSize: 5

    As I mentioned earlier, this procedure actually isn't too much different from the previous sample, in that we're building a block of data from the depth map then loading it into a container object, just in this case we're using an array of ParticleSystem.Particle objects instead of a Color array, and we're calling SetParticles() instead of SetPixels().  That in mind, you've probably already started figuring out how to integrate the code and concepts from the previous tutorial into this project, so let's go ahead and plow forward.  First, well need to add a few more members to our behaviour:

public float MaxPointSize;
public int XRes, YRes;
public float MaxSceneDepth, MaxWorldDepth;

private PXCUPipeline mSession;
private short[] mDepthBuffer;
private int[] mDepthSize;
private ParticleSystem.Particle[] points;
private int mXStep, mYStep;

  • MaxSceneDepth: The maximum Z-amount for particle positions
  • MaxWorldDepth: The maximum distance from the camera to search for depth points
  • mDepthBuffer: Intermediate container for depth values from the camera
  • mDepthSize: Depth map dimensions queried from the camera. We'll replace our hardcoded 320,240 with this

    The only major additions we need to make to our Start() method involve spinning up the camera and using some of that information to properly set up our particle system.  Our new Start() looks like this:

void Start()
{
    mDepthSize = new int[2];
    mSession = new PXCUPipeline();
    mSession.Init(PXCUPipeline.Mode.DEPTH_QVGA);
    mSession.QueryDepthMapSize(mDepthSize);
    mDepthBuffer = new short[mDepthSize[0]*mDepthSize[1]];

    points = new ParticleSystem.Particle[XRes*YRes];
    mXStep = mDepthSize[0]/XRes;
    mYStep = mDepthSize[1]/YRes;

    int pid=0;
    for(int y=0;y<mDepthSize[1];y+=mYStep)
    {
        for(int x=0;x<mDepthSize[0];x+=mXStep)
        {
            points[pid].position = new Vector3(x,y,0);
            points[pid].color = Color.white;
            points[pid].size = MaxPointSize;
            ++pid;
        }
    }
}

    The bulk of the changes are going to be in the Update() method.  The big difference between working with a particle cloud and a texture as in the previous example is that we need to know the x and y positions for each particle, thus the nested loops as opposed to a single loop for pixel data.  This makes the code a bit more verbose, but not a ton more difficult to grok, so let's take a stab at building a new Update() method:

void Update()
{
    if(mSession.AcquireFrame(false))
    {
        mSession.QueryDepthMap(mDepthBuffer);
        int pid=0;
        for(int dy=0;dy<mDepthSize[1];dy+=mYStep)
        {
            for(int dx=0;dx<mDepthSize[0];dx+=mXStep)
            {
                int didx = dy*mDepthSize[0]+dx;

                if((int)mDepthBuffer[didx]>=32000)
                {
                    points[pid].position = new Vector3(dx,mDepthSize[1]-dy,0);
                    points[pid].size = 0.1f;
                }
                else
                {
                    points[pid].position = new Vector3(dx, mDepthSize[1]-dy, lmap((float)mDepthBuffer[didx],0,MaxWorldDepth,0,MaxSceneDepth));
                    float cv = 1.0f-lmap((float)mDepthBuffer[didx],0,MaxWorldDepth,0.15f,1.0f);
                    points[pid].color = new Color(cv, cv, 0.15f);
                    points[pid].size = MaxPointSize;
                }
                ++pid;
            }
        }
        mSession.ReleaseFrame();
    }

    particleSystem.SetParticles(points, points.Length);
}

    So like I said, a bit more verbose, but hopefully not terribly difficult to understand.  A few things to be aware of:

int didx = dy*mDepthSize[0]+dx;

    We use the variable didx as an index into the depth buffer.  The reason we do this is because our particles don't correspond 1:1 to values in the depth buffer, so we use each particle's x and y position to do the depth buffer lookup.  In the next example, we'll take a look at how we can actually have a 1:1 depth buffer to particle setup using generic types.

if((int)mDepthBuffer[didx]>=32000)
{
...
}
else
{
...
}

    Here, the reason we test against a depth value of 32000 is because this is what the Perceptual Computing SDK uses as the error term.  So if the SDK can't resolve a depth value for a given pixel, it sends back 32000 or more.  In this case, if we find an error term, we make the particle really small, but in the next example, we'll look at how we can skip that particle altogether if we have an error value.  Finally, remember we need to implement some sort of range remapping function, I call mine lmap as a homage to Cinder's remap, but you can call it whatever, again, it's basically just:

float lmap(float v, float mn0, float mx0, float mn1, float mx1)
{
    return mn1+(v-mn0)*(mx1-mn1)/(mx0-mn0);
}

    So that's that, in the next sample, we'll look at some different ways to map the depth buffer to a particle cloud and use the PerC SDK's UV mapping feature to add some color from the RGB stream to the particles.  Until then, email me, follow me on Twitter, find me on facebook, or otherwise feel free to stalk me socially however you prefer.  Cheers!


What can i say, i love OpenNI...

Wednesday, March 27, 2013

[TUTORIAL] Depth maps and Ultrabooks

    Went to a really great hack-a-thon this past weekend at the Sacramento Hacker Lab to help coach some folks through working with the Perceptual Computing SDK and got to see some really cool work being done, everything from a next-generation theremin to a telepresence bot, all powered by the Creative 3D Camera and Perceptual Computing SDK.  Does me good to actually get out into the community and see people just dive right in and start building stuff.  Compound that with the GDC Dev Day that personally I think went amazingly well (standing room only at one point!) and it's been a good GDC for Perceptual Computing so far.  But now comes the really hard part, which is that PerC needs to not become a victim of its own success.  As the technology gets into more hands, now it becomes about not burning through goodwill by breaking features, being uncommunicative, or not keeping up with the ecosystem.  But I digress...

    Wanted to share a little Unity tip I got asked about a few times during the hack-a-thon, and that's how to visualize the depth map.  The SDK ships with a sample for visualizing the label map, and visualizing the color map is a fairly trivial change, but visualizing the depth map requires a little bit of doing.  It's actually pretty trivial from a working standpoint, so let's take a look at what's required.

    To get a depth map into a usable Texture2D, the basic flow is:
  • Grab the depth buffer into a short array
  • Walk the array of depth values and and remap them into 0-1 range
  • Store the remapped value in a Color array
  • Load the Color array into a Texture2D
    If that seems really simple, fear not, it actually is, so let's take a look at some code and see how we accomplish this.  Here's a really simple Unity behavior that populates the texture object from the depth map.  I'll leave assigning the texture as an exercise to the readers:

using UnityEngine;
using System.Collections;

public class Test : MonoBehaviour
{
    private PXCUPipeline mSession;
    private int[] mDepthSize;
    private short[] mDepthBuffer;
    private int mSize;

    private Texture2D mDepthMap;
    private Color[] mDepthPixels;

    void Start()
    {
        mDepthSize = new int[2];
        mSession = new PXCUPipeline();
        mSession.Init(PXCUPipeline.Mode.DEPTH_QVGA);
        mSession.QueryDepthMapSize(mDepthSize);
        mSize = mDepthSize[0]*mDepthSize[1];

        mDepthMap = new Texture2D(mDepthSize[0], mDepthSize[1], TextureFormat.ARGB32, false);
        mDepthBuffer = new short[mSize];
        mDepthPixels = new Color[mSize];
        for(int i=0;i<mSize;++i)
        {
            mDepthPixels[i] = Color.black;
        }
    }

    void Update()
    {
        if(mSession.AcquireFrame(false))
        {
            mSession.QueryDepthMap(mDepthBuffer);
            for(int i=0;i<mSize;++i)
            {
                float v = 1.0f-lmap((float)mDepthBuffer[i],0,1800.f,0,1.f);
                mDepthPixels[i] = new Color(v,v,v);
                mDepthMap.SetPixels(mDepthPixels);
                mDepthMap.Apply();
            }
            mSession.ReleaseFrame();
        }
    }

    float lmap(float val, float min0, float max0, float min1, float max1)
    {
        return min1 + (val-min0)*(max1-min1)/(max0-min0);
    }
}

    So like i said, fairly simple, albeit verbose technique, but should be fairly easy to wrap it up into a simple function for quick future use.  This same technique can also be used to visualize the IR map with some very minor tweaks.  I've actually been doing alot of stupid depth map tricks the last few days.  I'm at GDC all this week so I'm not sure how much dev time I'll get to be able to polish a few more of these up but maybe the weekend'll afford me some cycles if i'm not in full on crash out recovery mode...

Saturday, April 14, 2012

prototyper's toolbox: pythonic edition

        I had a really good convo with a co-worker today and I realized I miss working in Python just a wee bit.  For prototyping especially, why wouldn't you use Python?   I'm surprised the thought hasn't really hit me until just now, but you know, the fast turnaround provided by working in an interpreted environment is fairly ideal for rapid prototyping, no?

        As much as I like Unity, it's definitely getting to the point where i'm having to do enough custom implementation that it's putting a damper in my relevant iteration time.  Don't get me wrong, i'm enjoying getting to dip my toes into other languages and features (learning P/Invoke has been pretty cool), but i feel like a Python based prototyping environment might get me a little further a little faster.  More often than not, Python modules work in whatever your Python environment is, and I understand that's not a 1-to-1 comparison as Unity is not a pure .NET environment, but still...

        So in my wanderings last night, I dug up a few different tools that seem like things I'll want to be diving into next.  I went to bed super early, so I haven't spent a ton of time with alot of these resources, but enough to feel like these will all be useful in the future.  Once i get done with this current demo cycle, I'm going to get out of Unityland and start writing standalone apps, just to get more practice writing big software projects.  I feel like I'll have more flexibility in a pure python environment and I'll probably get more done faster. Props to my co-worker Chris for inspiring my search...


Modules/Libraries
        Most of these provide the full suite of lower-level functionality you need for prototyping/building media applications (event loop processing, input management, etc), just import whatever else you need alongside them and you're good to go.  Fair warning, some of these are NUI/MT specific, but then, that's really what I'm into these days.  I gotta say it's also made me realize how much of a gadgetwhore I am, but man, I hate spending money on them, which is probably why i don't have one.  That and it also makes me realize how much of a touch interface freak I am.  I can't say I'm huge on gestures, but touch is cool.  I actually found a fairly extensive list of game engines that would probably be make great generic event loop/input/rendering managers too, that's for another blogpost...

android-pythonPython for Android
I'm not 100% sure why i put this here but it seemed like a cool little aside. I only glanced over the docs a bit, so I can't make any recommendations, but I will say it's definitely more of a power tool than a ready to go development resource. More and more i keep finding reasons to want to get that Android device i keep threatening to get, but then i think, ugh, do i really want to spend money on another gadget? "Another", like i own a bunch of them already...

pygame_projects pygame and PyKinect
I lumped both of these together because most of the PyKinect samples run on pygame anyway, altho nothing precludes you from using your event loop manager (heretoforth referred to as ELMs) of choice. While this isn't necessarily MT, if you want to get started with NUI prototyping, this is honestly the way I'd recommend going. The Kinect SDK is super easy to write code against, you'll be doing crazy things in no time.

vpython_projectsVPython
Alright kids, gather around, and let me tell you a tale of POVRay...yes, I just dated myself horribly, but then, i'm constantly getting told that I'm too old for...certain people anyway, so i guess it is what it is. But really, that's about what we have here, even to the point where VPython lets you export to POVRay renderable files. How cool is that? Also includes its own version of IDLE, but I'm going to have to frown on that...

kivy_projectskivy
From what I understand, this is the way to go for Python MT development. I found a few other options (PyMT, etc), but this seems to be the one everyone recommends. If you're an experienced pythonista or have an established development environment, you can skip some of the weird setup requirements and dive right in. Get started now and whip some cool stuff up for their next contest!

tuio_projectspyTUIO
No discussion of MT development would be complete without including some TUIO bindings, so here you go! There are a few dependencies you might want to be aware of too (most notably reacTIVision), but once you've get everything down, this is another great way to get up and running with minimal hardware investment and setup. Make your own Reactable, actually, i've just hit on a plan...


Art IDEs
        Sure you could sit in a coffee shop and write a book, but let's be honest, if any chick looks over your shoulder and sees you rockin some cool interactive art in one of these apps, there's an icebreaker. Show her your camera or other input device, get her to play around with it a bit and it's all over except for the part where you embarrass yourself horribly trying to ask her out...Probably better to just get a bunch of buddies together and rock some interactive art jams on your laptops, takes me back to the days of laptop jamming with Live.  Or at least I think it would, i'll know more tomorrow, actually going to a group Processing session of sorts, should be fun. May even be the beginning of my social life...

nodebox_projectsNodebox 2
If you're a Maya or Houdini Tech Artist, or just an ICE freak, this one's for you.  I actually came across Nodebox a while back, but got a sad panda because it was MacOS only, altho I suppose it would have been a good use for my still not very used Macbook Pro. But yeah, this is basically Processing with a hypergraph attached to it, how cool is that? And Python to boot, so it's like Maya, but light and stable...ish.

shoebot_projectsShoebot
Shoebot is the best-ish of both worlds in that you can run it from its own IDE or you can import it into existing Python projects. It's also a...well, let's say derivative, for lack of a better term, of Nodebox, so most of the docs you find for one apply to the other. Not to down on the work of the Shoebot guys, it's a "derivative" like pyprocessing or pycessing are derivatives of Processing.


Additional Reading
        A few last little tidbits to keep your head in the MT game, skip this if you're not interested in this sort of thing.

txzone_header31Txzone
All sorts of really fun musings here, not much of a learning resource, but great for inspiration and keeping up with what all's out there for the MT pythonista...


pymt_projectsGetting Started With MT Dev In Python
Some dated and slightly specific tutorials, but definitely great for a quick dip of your toes into the whole world of Python MT/NUI development.


Part 1 | Part 2 | Part 3 | Part 4


        I've got some pretty cool interactive art projects in the pipe right now, no ETA on any of them yet, but hopefully I'll be able to post some stuff up in the near future.  Got some longer term "milestones", altho I'm not sure milestone is the proper term since they tend to equate to public releases or showings of some sort...Nothing like a little pressure.

Wednesday, March 14, 2012

from my cold, dead, hands...

        Well, ok maybe not quite that dark, but at least I look somewhat civilized when I'm using a Kinect, unlike well...


        Gah, ok ok, I promised myself i'd stop talking smack about former large software companies i may or may not have worked for.  I dunno it's weird, if you're like me, you always feel like once you leave a company in bad blood, you're forever professionally competing with them as long as you're in the same industry.  Not to put too fine a point on anything, or anything, hehe...

        Aaaanyway, so i feel like i'm at a good enough spot with KinectCam to drop some knowledge on some folks if you're interested in playing with this stuff yourself.  I gotta say I might have written Kinect off a bit early, I'm having a good time playing around with it and its ilk.  Granted, none of the games I've ever played on Kinect are doing the sort of stuff I've been doing, I sorta wonder what kind of crazy game you could come up with using the depth stream...Ok, sure, i'm just reaching there, but probably not, I bet someone (Jeff Minter) could come up with some insane depth stream game.  Actually I'm thinking of some sort of pattern recog app that i can feed my CD collection into or maybe just stuff the audio array, you know anything to avoid this sort of thing (Hmm, this would be funnier if you didn't have to squint for the text):

MLFail

        Alright, well, mindless self indulgence aside, let's get to this MS Kinect SDK wrapper.  Odd how this will probably be the only such post I make that's going to apply to this particular wrapper, therein crawling another bug up my nose, the fact that I wish MS would just release an official Unity wrapper/plugin/whatever.  Truth be told though, it probably wouldn't be terribly hard to compile down my own DLL, it's probably more of a time issue to make sure I expose and marshall everything properly, not to mention proper SDK.  But SDK specifics aside, all the maths herein should be pretty easy to re-apply since it's just a few simple space conversion tricks.

        So recap from my previous post, make sure you install the following softwarez:
        I've alluded to the camera control thing for a while, so let's just dive right in and get that taken care of, then I'll do a separate post about the Kinect Wrapper guts.  Again, that probably won't be terribly interesting, mainly it's just for me.

        Alright, so to get stuff working in this environment is pretty simple.  Import the KinectWrapperPackage and you'll have all the scripts and objects you need to get started.  I recommend just starting with a blank scene and build up for there, altho you could pop open the KinectExample scene and make blobs dance around wildly.

        Once you have a new scene (taxing task that that is), all that's required to make it Kinect-aware is to drag a Kinect_Prefab from the Project into the scene, as so:

kinectPrefabSetup

        This scene doesn't actually do anything yet, obviously, but you can use the Kinect_Prefab to setup your camera.  If you play the scene, you may notice the camera moving around a bit and focusing in odd places (hey buddy, my eyes are UP HERE), which can be fixed by setting some values in the KinectSensor attached to the Kinect_Prefab:

kinectSensorSetup

       I've been using the included Skeletal Viewer in the SDK to make sure i'm getting good coverage, once you find some numbers that work, you can always go into the KinectSensor code and set your own defaults if you want.

       Alrighty then, time to get the camera moving.  So, I went the hack route and used Unity's built-in MouseLook script as a jumping off point, as it only required a few minor changes to the camera transform code.  The part that requires a bit of work is getting Kinect skeletal numbers into Unity friendly numbers, and when i say "bit", i mean it, it's actually not that hard.  So the first thing I did was for my own sanity, and that's setup a little GUI indicator that tells me if I'm tracking or not.  Polling the camera for the depth image in this wrapper is a bit annoying because you have to restart Unity every time you stop running.  Might be a fun project to figure that out and re-implement depth and color display as a GUI texture.  Something to keep in mind for my next project.  Anyway, so verifying tracking is pretty simple, i put this all in a script called FromBonePosition:


        Pretty straightforward, we're just pulling some functionality from the included SkeletonWrapper class, which...well, wraps Skeleton functionality.  Truth be told, I feel like this class is a bit of an extra, but whatever.  Anyway, breaking down the code:
  • Really all pollSkeleton() does is call the native NuiSkeletonGetNextFrame(), i'll leave what that probably does as an exercise to the reader.
  • trackedPlayers[] is interesting.  The details of how we get there are a bit unimportant at this stage, the important note is that we're grabbing an enum that tells us what we're tracking.  KinectWrapper initializes the values in trackedPlayers[] to -1 which indicates that we haven't even acquired a skeleton.  The possible enums are NUI_SKELETON_NOT_TRACKED, NUI_SKELETON_POSITION_ONLY, and NUI_SKELETON_TRACKED.  So if either of the two players is acquired, we can say we've tracked.
  • So once we've tracked, we spit out a string to the UI that tells us what's up.  
        Easy-peasy, yeah?  Well fear not, most of the Kinect polling is that straightforward, it's just flipping the numbers that takes some code.  So let's continue by polling the Kinect for a bone position, which we'll use to drive our camera.  Yeah, yeah, i know, classic Kinect "Hello, World!", recreate a mouse driver, but it's an easy place to start.

        Joints are pretty easy to poll, as the SkeletonWrapper class provides a few different arrays that contain joint information and the SDK provides us a convenient enum for specifying which joint to query for data.  So let's add some code to our class:


        Simple, efficient (like the body itself), we add a variable to hold the right hand's position, then we pull a value from the bonePos[] array on the SkeletonWrapper.  You'll notice bonePos[] is a 2D array, the first id is which skeleton to poll (we might be tracking two players), the second id is pretty obviously the joint we want to get the position for.  You can see the full enum definition in the KinectInterop class if you should ever want to poll a different joint, or if you want to update a bunch of joints, or a whole skeleton, or make tea, or something like that.  We output that number to the GUI too, a) for verification purposes and b) so we can set some other numbers later.

       By now we pretty much know all the kinect stuff we need to know to get our camera moving, so let's get our camera look on.  Here's our member list (with comments!):


        And now...Maths!  The basic theory behind what we're doing is pretty simple:
  • Find the distance (as a percent) between the minimum and maximum x (oldX) that we get from the Kinect
  • Repeat for y
  • Cast that into (-1,1) so it mimics Unity's mouse input values
  • Rotate the camera
  • Profit, or at least impress your friends (or your mom)
        This is pretty simple, we can use some of the Unity built-ins to do all the scary maths for us, i'll just post the relevant code here:

       
        So yeah, we're basically parroting MouseLook's rotation setting and replacing Input.GetAxis() with the data we poll from the Kinect.  This SHOULD work, as it's almost verbatim the code I was using minus things like aim assist and project specific passing.  Play around with the OldX and OldY values, the Kinect SDK says that values for X can lie between (-2.2, 2.2) and Y can be (-1.6,1.6), but that's going to vary a bit depending on where you're hanging out.  For example, the values we ended up using were OldX = (-0.3,0.7) and OldY = (1.3,2.4).  Drop a texture onto the gui and set the rectangle based on hand position, that's a pretty simple way to get some good debug.  It's not too tricky to cast your value into screen space, try it out!
        I think that's all I got for now, going to try and port this to OpenNI/PrimeSense just for fun this weekend too.

Sunday, March 11, 2012

to the buttery depth(array)s

UPDATE(20120313):
{
You also need this plugin as well.  If you notice Unity throwing DLLNotFoundExceptions and grousing about MSRKINECTNUI.DLL, you probably don't have it installed.

KinectPlugin.zip
}
        Man, I wish I could talk about all the awesome stuff I saw at GDC, but sadly, most of my GDC was prepping for my talks, running around organizing events, some modicum of time lost commuting from San Jose to San Francisco, and trying not to suffer a total breakdown overall.  Nah, I make it sound worse than it really was, i think the most taxing part of the conference had...not much to do with the actual conference, tho it was def tangential.  As much as I'd like to whine about it here, that's another post for another blog for a much more inebriated state of mind.  I should have my GDC slides up in the very near future, so stay tuned.  I may do some highlights here or something like that.

        What I can show you is these awesome pictures from some of the Tech Art related events.  The trend of Tech Art presence of GDC escalating continued with 2012 in spades, as the photos from Boot Camp and Decompression can attest to:


WP_000293
Boot Camp about to get underway, another great crowd!

WP_000301
Decompressing after the show Friday...

WP_000298
...started with about 15 people back in 2010(?)...

WP_000302
...logged about 50 in 2012.  Not bad!

        But now it's back to the real world and demo crunch, although I have to admit this hasn't been a horrible demo crunch at all, and in fact I can probably blame my own poor scheduling.  Admittedly, I can also blame the fact that I didn't think the problem through and didn't write my own Kinect wrapper back when I started.  Yeah yeah, there are a few out there, but I'm really not sold on any of them.  I used the zigFu one for a bit, but I think i'm philosophically opposed to using that one.  It crashes Unity, it's a known bug, and it seems the answer is "It'll be fixed when our commercial version comes out".  I appreciate everyone needing to make a buck but...no.

        So we decided to take a look at some of the MS SDK based solutions, despite the Microsoft stuff seeming to be a mixed bag just because it feels like there's been so much splintering between SDK releases.  I did find a version from the good folks at Carnegie Mellon's Entertainment Technology Center (ETC), an organization at which I've had the pleasure of speaking, as well as the opportunity to work with many of alums.  Having failed miserably to get a hand tracking based solution working, we decided to focus a bit on skeletal tracking instead.  Now, I feel more and more like this was a failed design decision more than a fail of technology, but at this point, I'll try anything once. Just need to get something usable by Tuesday.

        Quick aside, I really feel at this point like it's my duty to write a good wrapper for Kinect to Unity.  I feel like all the ones that have been made available to date have been written by people who have more experience using SDKs and less experience developing SDKs.  This could just be the fact that there hasn't been alot of feedback, but anyway, I digress...

        So head over to the MS Kinect - MS SDK page at ETC's Unity3d web and grab a few files.  You'll need at minumum:

  • Microsoft Kinect SDK - Grab the one on the page, as this is a beta release.  From what I've heard, the projects don't work with the official release.  Also, i've only loosely verified this, but the drivers in this package only work with XBox 360 Kinects.
  • Kinect Wrapper Example Project - Basic stuff to get you going without too much other overhead
  • DirectX June 2010 SDK - Some of the samples in the Kinect SDK require this.  If you get a redistributable error on installing (s1023 or something like that), uninstall all VS2010 redistributables later than 30139 and try again.  Should be good to go.
  • DirectX End-User Runtime - I believe some of the Unity samples require this

        Install everything in no particular order, plug your Kinect in, and you'll be good to go.  Windows Update might toss you some noise about looking for updated drivers (because like everything MS, it thinks you're stupid), but that probably isn't too big a deal.  Next installment we'll talk about some of the flow in and out of the Unity Kinect wrapper...Fun fun!  I'm using this mainly as a way to step through some key bits of the Nui namespace in prep for more kinect/depth camera work coming up.  I'm working on the final kinect camera driver the next two days, so I'll finally be able to toss that up as part of the wrapper exploration.  It's a fairly simple jumping off point so...anyway.  Sleep comes.