Showing posts with label unity3D. Show all posts

Sunday, March 31, 2013

[TUTORIAL] Visualizing Depth in Unity, part 2

    The joys of having a laptop capable of development, I'm seriously in love with my Ultrabook.  This isn't just me shilling for the company, I'm totally sold on this thing.  Apple did right by forcing people to figure out how to build smaller, lighter laptops that still pack serious development punch.  For reference, I'm currently working off of a Gigabyte U2442, would be nice to get something that has a Core i7 CPU, but this one's a Core i5 at 3.1 with a mobile Geforce 6xx, so I'm happy with it.  Made it easy for me to bang out this second depth sample from the comfort of a...actually I think it was a bar as opposed to a coffee shop...


The Technolust, i sorta haz it...

    I mentioned in my last post I'd been messing around with some other methods for visualizing depth from the Creative Camera, I took a few moments after GDC to decompress and finish this one up, it sorta builds off the last sample.  Instead of visualizing a texture, I'm using the depth to set attributes on some particles to get that point cloudy effect that everyone seems to know and love.  This one's a bit more complex, mainly because I added a few parameters to tweak the visualization, but if you've got some Unity under your belt, none of this will be that tricky, and in fact, you'll probably see pretty quickly how setting particle data is very similar to setting pixel data.  I should also note that the technique presented here could apply to any sort of 3d camera, pretty much if you can get an array of depth values from your input device, you can make this work.  So here's what we're trying to accomplish when all's said and coded:
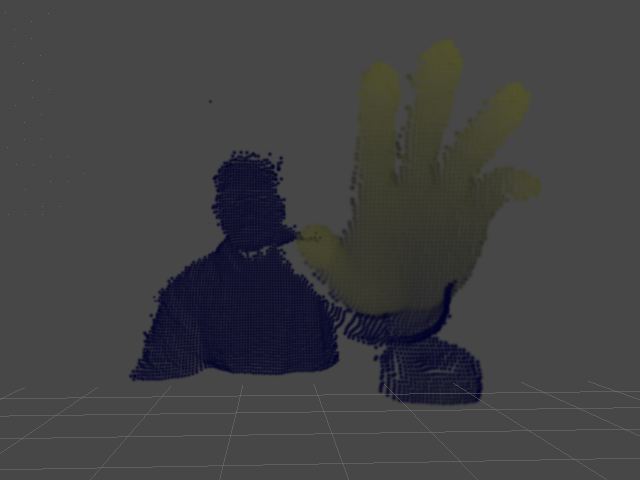

    Since this is a Unity project, we'll need to set up a scene first.  All that's required for this is a particle system, which you can create from the GameObject menu (GameObject > Create Other > Particle System).  Set the particle system's transforms (translate and rotate) to 0,0,0 and uncheck all the options except for Renderer.  Next, set the Main Camera's transform to 160,120,-240, and our scene is ready to go.  That all in place, we can get to coding.  We'll only need a single behavior for this test, which we'll put on the particle system.  I called mine PDepth, but you'll call it Delicious (or whatever else suits your fancy)!  First, let's set up our particle grid and visualization controls:

//We'll use these to control our particle system
public float MaxPointSize;
public int XRes, YRes;

private ParticleSystem.Particle[] points;
private int mXStep, mYStep;

  • MaxPointSize: This controls the size of our particles
  • XRes, YRes: These control the number of particles in our grid
  • points: This container holds our individual particle objects
  • mXStep, mYStep: These control the spacing between particles (this is calculated, not set manually)

    With those in place, we can populate our particle grid and get some stuff on screen.  Here's what our initial Start() and Update() methods should look like:

void Start()
{
    points = new ParticleSystem.Particle[XRes*YRes];
    mXStep = 320/XRes;
    mYStep = 240/YRes;

    int pid=0;
    for(int y=0;y<240;y+=mYStep)
    {
        for(int x=0;x<320;x+=mXStep)
        {
            points[pid].position = new Vector3(x,y,0);
            points[pid].color = Color.white;
            points[pid].size = MaxPointSize;
            ++pid;
        }
    }
}

void Update()
{
    particleSystem.SetParticles(points, points.Length);
}

    If you're wondering where the values 320 and 240 came from, we're making some assumptions about the size of our depth map to set the initial bounds.  Once we add in the actual depth query, we'll fix that and not have to rely on hardcodes.  Otherwise, if all went according to plan, we should have a pretty grid of white particles.  Be sure to set some values for XRes, YRes, and MaxPointSize in the Inspector!  For this example, I've used the following settings:
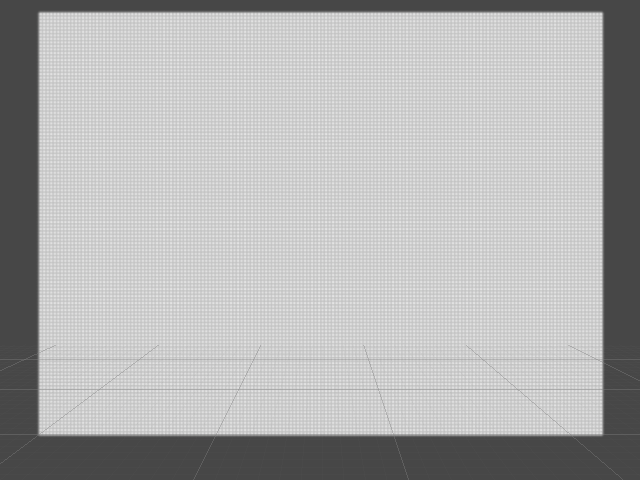
  • XRes: 160
  • YRes: 120
  • MaxPointSize: 5

    As I mentioned earlier, this procedure actually isn't too much different from the previous sample, in that we're building a block of data from the depth map then loading it into a container object, just in this case we're using an array of ParticleSystem.Particle objects instead of a Color array, and we're calling SetParticles() instead of SetPixels().  That in mind, you've probably already started figuring out how to integrate the code and concepts from the previous tutorial into this project, so let's go ahead and plow forward.  First, well need to add a few more members to our behaviour:

public float MaxPointSize;
public int XRes, YRes;
public float MaxSceneDepth, MaxWorldDepth;

private PXCUPipeline mSession;
private short[] mDepthBuffer;
private int[] mDepthSize;
private ParticleSystem.Particle[] points;
private int mXStep, mYStep;

  • MaxSceneDepth: The maximum Z-amount for particle positions
  • MaxWorldDepth: The maximum distance from the camera to search for depth points
  • mDepthBuffer: Intermediate container for depth values from the camera
  • mDepthSize: Depth map dimensions queried from the camera. We'll replace our hardcoded 320,240 with this

    The only major additions we need to make to our Start() method involve spinning up the camera and using some of that information to properly set up our particle system.  Our new Start() looks like this:

void Start()
{
    mDepthSize = new int[2];
    mSession = new PXCUPipeline();
    mSession.Init(PXCUPipeline.Mode.DEPTH_QVGA);
    mSession.QueryDepthMapSize(mDepthSize);
    mDepthBuffer = new short[mDepthSize[0]*mDepthSize[1]];

    points = new ParticleSystem.Particle[XRes*YRes];
    mXStep = mDepthSize[0]/XRes;
    mYStep = mDepthSize[1]/YRes;

    int pid=0;
    for(int y=0;y<mDepthSize[1];y+=mYStep)
    {
        for(int x=0;x<mDepthSize[0];x+=mXStep)
        {
            points[pid].position = new Vector3(x,y,0);
            points[pid].color = Color.white;
            points[pid].size = MaxPointSize;
            ++pid;
        }
    }
}

    The bulk of the changes are going to be in the Update() method.  The big difference between working with a particle cloud and a texture as in the previous example is that we need to know the x and y positions for each particle, thus the nested loops as opposed to a single loop for pixel data.  This makes the code a bit more verbose, but not a ton more difficult to grok, so let's take a stab at building a new Update() method:

void Update()
{
    if(mSession.AcquireFrame(false))
    {
        mSession.QueryDepthMap(mDepthBuffer);
        int pid=0;
        for(int dy=0;dy<mDepthSize[1];dy+=mYStep)
        {
            for(int dx=0;dx<mDepthSize[0];dx+=mXStep)
            {
                int didx = dy*mDepthSize[0]+dx;

                if((int)mDepthBuffer[didx]>=32000)
                {
                    points[pid].position = new Vector3(dx,mDepthSize[1]-dy,0);
                    points[pid].size = 0.1f;
                }
                else
                {
                    points[pid].position = new Vector3(dx, mDepthSize[1]-dy, lmap((float)mDepthBuffer[didx],0,MaxWorldDepth,0,MaxSceneDepth));
                    float cv = 1.0f-lmap((float)mDepthBuffer[didx],0,MaxWorldDepth,0.15f,1.0f);
                    points[pid].color = new Color(cv, cv, 0.15f);
                    points[pid].size = MaxPointSize;
                }
                ++pid;
            }
        }
        mSession.ReleaseFrame();
    }

    particleSystem.SetParticles(points, points.Length);
}

    So like I said, a bit more verbose, but hopefully not terribly difficult to understand.  A few things to be aware of:

int didx = dy*mDepthSize[0]+dx;

    We use the variable didx as an index into the depth buffer.  The reason we do this is because our particles don't correspond 1:1 to values in the depth buffer, so we use each particle's x and y position to do the depth buffer lookup.  In the next example, we'll take a look at how we can actually have a 1:1 depth buffer to particle setup using generic types.

if((int)mDepthBuffer[didx]>=32000)
{
...
}
else
{
...
}

    Here, the reason we test against a depth value of 32000 is because this is what the Perceptual Computing SDK uses as the error term.  So if the SDK can't resolve a depth value for a given pixel, it sends back 32000 or more.  In this case, if we find an error term, we make the particle really small, but in the next example, we'll look at how we can skip that particle altogether if we have an error value.  Finally, remember we need to implement some sort of range remapping function, I call mine lmap as a homage to Cinder's remap, but you can call it whatever, again, it's basically just:

float lmap(float v, float mn0, float mx0, float mn1, float mx1)
{
    return mn1+(v-mn0)*(mx1-mn1)/(mx0-mn0);
}

    So that's that, in the next sample, we'll look at some different ways to map the depth buffer to a particle cloud and use the PerC SDK's UV mapping feature to add some color from the RGB stream to the particles.  Until then, email me, follow me on Twitter, find me on facebook, or otherwise feel free to stalk me socially however you prefer.  Cheers!

What can i say, i love OpenNI...

Wednesday, March 27, 2013

[TUTORIAL] Depth maps and Ultrabooks

    Went to a really great hack-a-thon this past weekend at the Sacramento Hacker Lab to help coach some folks through working with the Perceptual Computing SDK and got to see some really cool work being done, everything from a next-generation theremin to a telepresence bot, all powered by the Creative 3D Camera and Perceptual Computing SDK.  Does me good to actually get out into the community and see people just dive right in and start building stuff.  Compound that with the GDC Dev Day that personally I think went amazingly well (standing room only at one point!) and it's been a good GDC for Perceptual Computing so far.  But now comes the really hard part, which is that PerC needs to not become a victim of its own success.  As the technology gets into more hands, now it becomes about not burning through goodwill by breaking features, being uncommunicative, or not keeping up with the ecosystem.  But I digress...

    Wanted to share a little Unity tip I got asked about a few times during the hack-a-thon, and that's how to visualize the depth map.  The SDK ships with a sample for visualizing the label map, and visualizing the color map is a fairly trivial change, but visualizing the depth map requires a little bit of doing.  It's actually pretty trivial from a working standpoint, so let's take a look at what's required.

    To get a depth map into a usable Texture2D, the basic flow is:
  • Grab the depth buffer into a short array
  • Walk the array of depth values and and remap them into 0-1 range
  • Store the remapped value in a Color array
  • Load the Color array into a Texture2D
    If that seems really simple, fear not, it actually is, so let's take a look at some code and see how we accomplish this.  Here's a really simple Unity behavior that populates the texture object from the depth map.  I'll leave assigning the texture as an exercise to the readers:

using UnityEngine;
using System.Collections;

public class Test : MonoBehaviour
{
    private PXCUPipeline mSession;
    private int[] mDepthSize;
    private short[] mDepthBuffer;
    private int mSize;

    private Texture2D mDepthMap;
    private Color[] mDepthPixels;

    void Start()
    {
        mDepthSize = new int[2];
        mSession = new PXCUPipeline();
        mSession.Init(PXCUPipeline.Mode.DEPTH_QVGA);
        mSession.QueryDepthMapSize(mDepthSize);
        mSize = mDepthSize[0]*mDepthSize[1];

        mDepthMap = new Texture2D(mDepthSize[0], mDepthSize[1], TextureFormat.ARGB32, false);
        mDepthBuffer = new short[mSize];
        mDepthPixels = new Color[mSize];
        for(int i=0;i<mSize;++i)
        {
            mDepthPixels[i] = Color.black;
        }
    }

    void Update()
    {
        if(mSession.AcquireFrame(false))
        {
            mSession.QueryDepthMap(mDepthBuffer);
            for(int i=0;i<mSize;++i)
            {
                float v = 1.0f-lmap((float)mDepthBuffer[i],0,1800.f,0,1.f);
                mDepthPixels[i] = new Color(v,v,v);
                mDepthMap.SetPixels(mDepthPixels);
                mDepthMap.Apply();
            }
            mSession.ReleaseFrame();
        }
    }

    float lmap(float val, float min0, float max0, float min1, float max1)
    {
        return min1 + (val-min0)*(max1-min1)/(max0-min0);
    }
}

    So like i said, fairly simple, albeit verbose technique, but should be fairly easy to wrap it up into a simple function for quick future use.  This same technique can also be used to visualize the IR map with some very minor tweaks.  I've actually been doing alot of stupid depth map tricks the last few days.  I'm at GDC all this week so I'm not sure how much dev time I'll get to be able to polish a few more of these up but maybe the weekend'll afford me some cycles if i'm not in full on crash out recovery mode...

Wednesday, April 11, 2012

with trees

        Updated to include Teck's suggestions so it looks less like machine and more like man(god?).  Now we get something that looks like this:

treecut2

Yes, this looks much better methinks.  Only slight changes, just dropping in new terms really:

Tuesday, April 10, 2012

there is unrest in the forest

        You know, the thing with Unity is not so much the presence or lack thereof features, it's the same issue alot of software has, and that's the lack of not just documentation, but useful, relevant documentation.  I feel like too many companies assume that it's ok to just put out basic documentation for new users and then let the community pick up the slack.  That's alright I suppose, but that doesn't mean you can slack on the basic documentation.  For instance:
function GetHeight (x : int, y : int) : float
Description
Gets the height at a certain point x,y
Really?  A function called GetHeight() that returns a height value?  No Shit?  How about some information about the input parameters?  What is the expected range of values, for instance?  How about the return value, what do the units come back as?  You know, little things, back to that whole idea of useful and relevant, right?  Sheesh.


...Captain Obvious is Obvious, Captain...

        My ire comes from a perfect case, one of today's tasks was to spawn trees on a Terrain based on the heightmap.  All the pieces are there, it's actually quite a simple process, but again, it's just not knowing the little things that results in probably a bit more experimentation than necessary.  Really I'm just whining, but i've run into so many cases of this sort of thing with so many software packages I've used (looking at you, Maya), that at some point you just wanna contract out and document the stuff yourself for them.

        So rant over, if you're interested in doing this sort of thing yourself, here's some code that might be useful:


        Obviously you'd want to add some sort of noise to the tree placement and maybe even add some simple tree variants so it doesn't look like a military haircut, but this code produces a good starting point, something like this:


treecut

        You could probably get even more headway by sampling other maps or attributes to add a bit more spottiness to the placement or maybe even do a radial tap per sample step, something like that. Dunno, if you make any useful changes to this, let me know! Otherwise I'm just going to do it myself and...well, i guess that's not that bad.

Tuesday, March 20, 2012

prototyper's toolbox

        Nothing special here, just a bunch of tools I've been using recently to do rapid prototyping.  It's such an alien concept to me to just throw a bunch of hardware and software into a blender and see what comes out, but it's pretty freakin fun.

banner
Unity
Probably needs no explanation, really good platform for prototyping as it's open enough to do things that aren't necessarily games.

oF_0
openFrameworks
Everything you need to create rich interactive applications under one roof. This is the model for what easy-to-use SDKs should be.

processing_cover
Processing
It's like an IDE for doing cool graphical stuffs. For you Pythonistas, check out pyprocessing as well.

vvvv
vvvv
Just found out about this the other day, node based madness.

ArenaLogo
OpenNI
Definitive framework for natural interaction (gestures, etc). A bit of a learning curve, but good to know.

        So what are some of your favorite rapid prototyping tools?  And if you say UDK, i swear i WILL hunt you down and punch you in the heart...

Saturday, March 17, 2012

git some!

        So i spent a decent chunk of the day mucking around with Unity projects and version control...well ok truth be told, it's actually been a few days, first with SVN and now with git.  Now, obviously you're not going to get all the DVCS benefits with content, but being able to branch scripts could be pretty cool.  We're not doing the sort of focused development that's really going to require that I don't think, but who knows?  I have some folks that I want to get up to speed a bit on Unity Scripting, so having safe sandboxes for them to script in is definitely a plus.

hydra
For every branch you merge, two more...

        Github's been unreachable for a few days and I needed to get up and functional pretty quick, so I went with bitbucket.  God knows I pull enough code from bitbucket, might as well join the revolution.  Also free private repos, which is good because I may or may not be posting somewhat sensitive content.  So, there are a few things we need to do first, I'm going to assume you have Unity installed, if not, think about doing that at some point ;)  Other than Unity, you'll want to get git on your machine too.  For Windows users, you'll want to grab two software packages:
  • Git for Windows (msysgit) - You'll want to grab the most recent Git-1.7.x-Preview file, at the time of this writing it's 1.7.9
  • TortoiseGit (optional) - If you've ever used Tortoise, you'll know what this is, otherwise, it's a very easy to use git windows shell extension.  Most of your day-to-day will happen here, unless you just love command lines...and there's nothing wrong with that.  I'll be covering how to do everything through TortoiseGit where possible here, but again, you can also do it all with the command line/GitBash.

git-logo Git_tortoisegit_logo

        Make sure you install msysgit first, as TortoiseGit obviously requires it.  I would uncheck the Windows Explorer integration option, but otherwise it's pretty straightforward.  TortoiseGit is equally straightforward, make sure you install OpenSSH vs the Putty option, as we'll want OpenSSH for bitbucket.  Speaking of, grab yourself a bitbucket account too, the free 5 user account is more than sufficient for what we're doing, unless you have a bigger team that's going to need access to the repo.  In that case, i might still only leave the number of users on the bitbucket repos fairly small and set something up to push to a different repo for a larger group (hmmm...another blog post??).  Be sure to refer to the bitbucket Docs on setting up git, as well.  You'll also need to make sure you're SSH friendly, which is a bit of a process.  Thankfully, it's also documented on bitbucket, and they do a much better job of explaining than I'm going to.  You can skip step 5, altho it is a cool little trick.  So the whole process then, looks like this:
  • Create a bitbucket account
  • Install Git for Windows - bitbucket Documentation
  • Install TortoiseGit (optional)
  • Setup SSH - bitbucket Documentation
  • Create a a git repo on bitbucket
  • Create a folder for your Unity project
  • Create a new project in said folder (don't import any Unity assets)
  • Enable external version control in Unity
  • Delete the Library folder in your project
  • Create a git repo in your Unity project folder
  • Commit the changes
  • Add your bitbucket URL to your local repo settings
  • Push the local repo to bitbucket<
        If you're familiar with TortoiseGit, this is a pretty straightforward process, but I'm guessing for alot of the readers, that's not the case, so in the next post, I'll step through the rest of the process (with pictures).  There are alot of steps, but they're not long involved steps, so the whole process actually goes pretty quickly.  I just got lazy because i've spent the last two days taking screen caps and I'm realizing that i need to rethink how i do my images for this tutorial, so Stay tuned...

recycled

Wednesday, March 14, 2012

from my cold, dead, hands...

        Well, ok maybe not quite that dark, but at least I look somewhat civilized when I'm using a Kinect, unlike well...


        Gah, ok ok, I promised myself i'd stop talking smack about former large software companies i may or may not have worked for.  I dunno it's weird, if you're like me, you always feel like once you leave a company in bad blood, you're forever professionally competing with them as long as you're in the same industry.  Not to put too fine a point on anything, or anything, hehe...

        Aaaanyway, so i feel like i'm at a good enough spot with KinectCam to drop some knowledge on some folks if you're interested in playing with this stuff yourself.  I gotta say I might have written Kinect off a bit early, I'm having a good time playing around with it and its ilk.  Granted, none of the games I've ever played on Kinect are doing the sort of stuff I've been doing, I sorta wonder what kind of crazy game you could come up with using the depth stream...Ok, sure, i'm just reaching there, but probably not, I bet someone (Jeff Minter) could come up with some insane depth stream game.  Actually I'm thinking of some sort of pattern recog app that i can feed my CD collection into or maybe just stuff the audio array, you know anything to avoid this sort of thing (Hmm, this would be funnier if you didn't have to squint for the text):

MLFail

        Alright, well, mindless self indulgence aside, let's get to this MS Kinect SDK wrapper.  Odd how this will probably be the only such post I make that's going to apply to this particular wrapper, therein crawling another bug up my nose, the fact that I wish MS would just release an official Unity wrapper/plugin/whatever.  Truth be told though, it probably wouldn't be terribly hard to compile down my own DLL, it's probably more of a time issue to make sure I expose and marshall everything properly, not to mention proper SDK.  But SDK specifics aside, all the maths herein should be pretty easy to re-apply since it's just a few simple space conversion tricks.

        So recap from my previous post, make sure you install the following softwarez:
        I've alluded to the camera control thing for a while, so let's just dive right in and get that taken care of, then I'll do a separate post about the Kinect Wrapper guts.  Again, that probably won't be terribly interesting, mainly it's just for me.

        Alright, so to get stuff working in this environment is pretty simple.  Import the KinectWrapperPackage and you'll have all the scripts and objects you need to get started.  I recommend just starting with a blank scene and build up for there, altho you could pop open the KinectExample scene and make blobs dance around wildly.

        Once you have a new scene (taxing task that that is), all that's required to make it Kinect-aware is to drag a Kinect_Prefab from the Project into the scene, as so:

kinectPrefabSetup

        This scene doesn't actually do anything yet, obviously, but you can use the Kinect_Prefab to setup your camera.  If you play the scene, you may notice the camera moving around a bit and focusing in odd places (hey buddy, my eyes are UP HERE), which can be fixed by setting some values in the KinectSensor attached to the Kinect_Prefab:

kinectSensorSetup

       I've been using the included Skeletal Viewer in the SDK to make sure i'm getting good coverage, once you find some numbers that work, you can always go into the KinectSensor code and set your own defaults if you want.

       Alrighty then, time to get the camera moving.  So, I went the hack route and used Unity's built-in MouseLook script as a jumping off point, as it only required a few minor changes to the camera transform code.  The part that requires a bit of work is getting Kinect skeletal numbers into Unity friendly numbers, and when i say "bit", i mean it, it's actually not that hard.  So the first thing I did was for my own sanity, and that's setup a little GUI indicator that tells me if I'm tracking or not.  Polling the camera for the depth image in this wrapper is a bit annoying because you have to restart Unity every time you stop running.  Might be a fun project to figure that out and re-implement depth and color display as a GUI texture.  Something to keep in mind for my next project.  Anyway, so verifying tracking is pretty simple, i put this all in a script called FromBonePosition:


        Pretty straightforward, we're just pulling some functionality from the included SkeletonWrapper class, which...well, wraps Skeleton functionality.  Truth be told, I feel like this class is a bit of an extra, but whatever.  Anyway, breaking down the code:
  • Really all pollSkeleton() does is call the native NuiSkeletonGetNextFrame(), i'll leave what that probably does as an exercise to the reader.
  • trackedPlayers[] is interesting.  The details of how we get there are a bit unimportant at this stage, the important note is that we're grabbing an enum that tells us what we're tracking.  KinectWrapper initializes the values in trackedPlayers[] to -1 which indicates that we haven't even acquired a skeleton.  The possible enums are NUI_SKELETON_NOT_TRACKED, NUI_SKELETON_POSITION_ONLY, and NUI_SKELETON_TRACKED.  So if either of the two players is acquired, we can say we've tracked.
  • So once we've tracked, we spit out a string to the UI that tells us what's up.  
        Easy-peasy, yeah?  Well fear not, most of the Kinect polling is that straightforward, it's just flipping the numbers that takes some code.  So let's continue by polling the Kinect for a bone position, which we'll use to drive our camera.  Yeah, yeah, i know, classic Kinect "Hello, World!", recreate a mouse driver, but it's an easy place to start.

        Joints are pretty easy to poll, as the SkeletonWrapper class provides a few different arrays that contain joint information and the SDK provides us a convenient enum for specifying which joint to query for data.  So let's add some code to our class:


        Simple, efficient (like the body itself), we add a variable to hold the right hand's position, then we pull a value from the bonePos[] array on the SkeletonWrapper.  You'll notice bonePos[] is a 2D array, the first id is which skeleton to poll (we might be tracking two players), the second id is pretty obviously the joint we want to get the position for.  You can see the full enum definition in the KinectInterop class if you should ever want to poll a different joint, or if you want to update a bunch of joints, or a whole skeleton, or make tea, or something like that.  We output that number to the GUI too, a) for verification purposes and b) so we can set some other numbers later.

       By now we pretty much know all the kinect stuff we need to know to get our camera moving, so let's get our camera look on.  Here's our member list (with comments!):


        And now...Maths!  The basic theory behind what we're doing is pretty simple:
  • Find the distance (as a percent) between the minimum and maximum x (oldX) that we get from the Kinect
  • Repeat for y
  • Cast that into (-1,1) so it mimics Unity's mouse input values
  • Rotate the camera
  • Profit, or at least impress your friends (or your mom)
        This is pretty simple, we can use some of the Unity built-ins to do all the scary maths for us, i'll just post the relevant code here:

       
        So yeah, we're basically parroting MouseLook's rotation setting and replacing Input.GetAxis() with the data we poll from the Kinect.  This SHOULD work, as it's almost verbatim the code I was using minus things like aim assist and project specific passing.  Play around with the OldX and OldY values, the Kinect SDK says that values for X can lie between (-2.2, 2.2) and Y can be (-1.6,1.6), but that's going to vary a bit depending on where you're hanging out.  For example, the values we ended up using were OldX = (-0.3,0.7) and OldY = (1.3,2.4).  Drop a texture onto the gui and set the rectangle based on hand position, that's a pretty simple way to get some good debug.  It's not too tricky to cast your value into screen space, try it out!
        I think that's all I got for now, going to try and port this to OpenNI/PrimeSense just for fun this weekend too.

Sunday, March 11, 2012

to the buttery depth(array)s

UPDATE(20120313):
{
You also need this plugin as well.  If you notice Unity throwing DLLNotFoundExceptions and grousing about MSRKINECTNUI.DLL, you probably don't have it installed.

KinectPlugin.zip
}
        Man, I wish I could talk about all the awesome stuff I saw at GDC, but sadly, most of my GDC was prepping for my talks, running around organizing events, some modicum of time lost commuting from San Jose to San Francisco, and trying not to suffer a total breakdown overall.  Nah, I make it sound worse than it really was, i think the most taxing part of the conference had...not much to do with the actual conference, tho it was def tangential.  As much as I'd like to whine about it here, that's another post for another blog for a much more inebriated state of mind.  I should have my GDC slides up in the very near future, so stay tuned.  I may do some highlights here or something like that.

        What I can show you is these awesome pictures from some of the Tech Art related events.  The trend of Tech Art presence of GDC escalating continued with 2012 in spades, as the photos from Boot Camp and Decompression can attest to:


WP_000293
Boot Camp about to get underway, another great crowd!

WP_000301
Decompressing after the show Friday...

WP_000298
...started with about 15 people back in 2010(?)...

WP_000302
...logged about 50 in 2012.  Not bad!

        But now it's back to the real world and demo crunch, although I have to admit this hasn't been a horrible demo crunch at all, and in fact I can probably blame my own poor scheduling.  Admittedly, I can also blame the fact that I didn't think the problem through and didn't write my own Kinect wrapper back when I started.  Yeah yeah, there are a few out there, but I'm really not sold on any of them.  I used the zigFu one for a bit, but I think i'm philosophically opposed to using that one.  It crashes Unity, it's a known bug, and it seems the answer is "It'll be fixed when our commercial version comes out".  I appreciate everyone needing to make a buck but...no.

        So we decided to take a look at some of the MS SDK based solutions, despite the Microsoft stuff seeming to be a mixed bag just because it feels like there's been so much splintering between SDK releases.  I did find a version from the good folks at Carnegie Mellon's Entertainment Technology Center (ETC), an organization at which I've had the pleasure of speaking, as well as the opportunity to work with many of alums.  Having failed miserably to get a hand tracking based solution working, we decided to focus a bit on skeletal tracking instead.  Now, I feel more and more like this was a failed design decision more than a fail of technology, but at this point, I'll try anything once. Just need to get something usable by Tuesday.

        Quick aside, I really feel at this point like it's my duty to write a good wrapper for Kinect to Unity.  I feel like all the ones that have been made available to date have been written by people who have more experience using SDKs and less experience developing SDKs.  This could just be the fact that there hasn't been alot of feedback, but anyway, I digress...

        So head over to the MS Kinect - MS SDK page at ETC's Unity3d web and grab a few files.  You'll need at minumum:

  • Microsoft Kinect SDK - Grab the one on the page, as this is a beta release.  From what I've heard, the projects don't work with the official release.  Also, i've only loosely verified this, but the drivers in this package only work with XBox 360 Kinects.
  • Kinect Wrapper Example Project - Basic stuff to get you going without too much other overhead
  • DirectX June 2010 SDK - Some of the samples in the Kinect SDK require this.  If you get a redistributable error on installing (s1023 or something like that), uninstall all VS2010 redistributables later than 30139 and try again.  Should be good to go.
  • DirectX End-User Runtime - I believe some of the Unity samples require this

        Install everything in no particular order, plug your Kinect in, and you'll be good to go.  Windows Update might toss you some noise about looking for updated drivers (because like everything MS, it thinks you're stupid), but that probably isn't too big a deal.  Next installment we'll talk about some of the flow in and out of the Unity Kinect wrapper...Fun fun!  I'm using this mainly as a way to step through some key bits of the Nui namespace in prep for more kinect/depth camera work coming up.  I'm working on the final kinect camera driver the next two days, so I'll finally be able to toss that up as part of the wrapper exploration.  It's a fairly simple jumping off point so...anyway.  Sleep comes.


Friday, February 24, 2012

sound advice

        Hey gimme a break, i went to bed at like 1 last night and i've been in a bit of crunch this week.  I keep saying that one of these days I'm going to start a job during a project that's NOT in crunch, but you know, it's a fun crunch.  Had the first dog-n-pony with the execs and I gotta say our team is working on some cool shit.  We got to postpone our demo for a week, which is good because I've only been in the code for about a week and a half, and the scope of our demo is pretty impressive.  I mean, not really, but given the time we've had to put it together...

Photobucket
It seemed like a manageable project at the time..!

        So I'm still working on the Kinect camera tutorial, I'm actually going to go in and tighten up the implementation, along with the graphics on level 3, so I'll have a bit of a better presentation.  It's a bit sad that I didn't have more time to really come up with some cool camera control, was hoping to do a little more than just build a mouse driver type thing, but you know, it's a good starting point.  I feel like the implementation I came up with is pretty solid, it's a good hybrid of a few different paradigms that make good sense.  Anyway, hopefully that's a fairly tantalizing preview.  I'll go over the basics of how to setup the zigFu/OpenNI stuff too so you can further hack away on Kinect.  If you haven't messed around with it yet, you should, I'm surprised it took me this long to get into it.


Thompson Eye Phone and Sogo-7s optional...

        Alright, so to some possibly meatier content, although I may be the only person who's run into this issue.  If that's the case, you guys are all jerks for not posting solutions!!  One of the things we've been beating our heads against somewhat for the last couple days is how to manage sound, in particular sound on events, such as collision.  Now, that's a fairly straightforward problem that you could solve in a few different ways, but here are some ways NOT to solve it:
  • The rather naive and seemingly obvious audio.Play() in Update(), it only seems obvious at very first glance
  • Immediately prior to a seemingly obvious Destroy() call.  Again, it only seems obvious at very first glance
        So, the first method we came up with was a bit brute force I'll admit, but if you know me, that probably comes as no surprise.  We setup a GameObject that's basically an audio container, so actually it's a GameObject and a script that exposes a bunch of public AudioClips.  You probably see where I'm going with this, if you guessed AudioSource.PlayOneShot() or AudioSource.PlayClipAtPoint(), pour yourself an expensive single malt shot.  For some reason, this made the audio sound really wonky, and it wasn't a 3d issue or a playing multiple clips issue.  We could have wrapped either one of these to get a bit more control over the AudioSource, but I felt like that was probably overkill.  For a larger project, I could see the benefit of this though, and it's definitely something I'll be exploring more.  I have a ton of questions about this pattern, performance issues mainly.


Brute Force? Heh, more like ME Force, amirite??

        The second method is about as straightforward, but I had some perf concerns again.  It's funny how I'm still in game developer mode and trying to make the transition to blue sky R&D developer mode.  Performance? Hah, we care not for your framerates and memory budgets!!  Or something...But yeah, basically we ended up attaching multiple AudioSources to the prefab and managing it in script.  The code was pretty simple, something to this effect:


        Obviously this is super naive and you'd want to do a bunch of other checks, but you get the idea, it's sketch code, whadyawant? I'm not very sanguine on this method largely due to the multiple AudioSources on each prefab, again, perf concerns. I may just be paranoid still...

        The solution we ended up going with is not ideal but serves as a bit of a springboard for a pattern I might have used if i had been thinking about it.  For each collision behavior, we exposed an AudioClip for that behavior, then switched out the object's AudioClip in the OnCollisionEnter() based on the name of the colliding object, i.e. We have an object in the world and based on the projectile's name, we swap out the AudioClip and play the AudioSource.  Again, i don't feel like this is super ideal because then we have assets all over the place, but it definitely made life easier for me because I could just concentrate on a behavior at a time. So we're looking at something like this:


        Again, super-naive, there are better ways to do the specifics, but you get the idea.  This seems to be working for now, so i'm going to just STFG and keep in mind what I've learned.

looks-good-to-me-ship-it

        I think, in retro, I would have gone with some method that was a hybrid of all of these, maybe have an audio manager type script attached to the prefab that exposed all the AudioClips i wanted to play then have each collision behavior poke into the audio manager.  I like the idea of keeping collision behaviors as separate script just because i hate looking at big scripts that manage everything.  That could just be me, honestly, I ain't to guud at readin teh codez, not bein a real programmer and all...

        Thoughts?  I'd love to hear from anyone else about how you tackle this sort of thing.  At some point i want to go back into library/SDK developer mode and start wrapping up a bunch of functionality like this for future Unity projects...

Saturday, February 18, 2012

skipping the obligatory intro post, let's dive right in

        So i've been getting my hands dirty with Unity again in a pretty big way.  Seriously, now that i've left the games industry, i'm actually making...well game-ish type things again, and somewhat having fun in the process.  Oh who am i kidding, this is probably the most fun I've had in the last 5 years or so.  Can't put too fine a point on what I'm doing at the new gig, but suffice it to say I'm doing some interaction design stuff that draws heavily on my experience in game development.  It's fun.

        But I'm not here to tantalize or be faux subversive in a rather clumsily veiled attempt to get people to ask me for more information.  Rather, I think i'm going to use this space to share random tips I come across during my game-ish interaction prototype development experience.  Probably some Unity randomness, tons of Maya randomness, and who knows, maybe some of that Python stuff i seem to love so much.

        Alright then, as the title states, let's dive right in.  One of the really interesting things I came across in the Unity reference manual:

"The most convenient way for animators to work is to have a single model containing all animations."

        Hmm...my 10+ years supporting animators in various degrees tells me otherwise, so of course I setup my character with individual animation files.  No referencing or anything pretty like that, this is a pretty quick n dirty project, so no infrastructure or pipe really.  We'll make that up next project, but that's for another post.  Anyway...

        If you're familiar with Unity, you may be aware that when you import an animation, it comes in as a Read-Only asset.  In short, it means you can't add animation events or otherwise edit the animation in Unity.  After a few hours, well ok, maybe only one, I found the accepted workaround, which is to duplicate the animation clip and thereby creating a new animation clip that's writeable.  I quickly found out that many of the explanations i found online where contingent on creating animation the Unity approved way, i.e. one long animation file.  That gives you an asset with a bunch of animation clips as children, like so:


         With this layout, it's pretty easy to break the Read-Only state, you simply select the clip and Edit > Duplicate or Ctrl+D and you're good to go.  The toolflow issues arise when you want to make an animation clip Read-Only and the animation is stored in a separate file.  In that case, you get an asset that looks something like this:


        In this case, you have actually have a bunch of individual assets that Unity collates into a single-ish asset.  The question now is how do you duplicate one of these to break the Read-Only state?  Well, selecting the actual asset and duplicating doesn't do it, it just creates another Read-Only animation entry.  We can attempt to duplicate the entry in the Inspector:


       ...But that just gives us the same end result:(  So what's a bear to do??  Good question, the secret actually lies in the animation asset's hierarchy.  If we expand one of the animation assets, we get all sorts of fun things:


        If we look down near the end of the animation asset's children, we find what we seek, the actual animation clip itself.  THAT'S what we want to duplicate, so we select that and Edit > Duplicate or Ctrl+D.  Now we have a discreet instance of the animation clip:


        Now we just have to drag this instance into the appropriate slot in the character's Animation block in the Inspector, and we're good to go:


        Now we can add Animation Events to our heart's content.  Keep in mind we lose all this data when we reimport, so it's probably a good idea to come up with some sort of automated process for this.  Good case for some sort of metadata system...Maybe we'll talk about that at some point, I do need to learn Unity Editor Scripting, but honestly, I have no idea when I'm going to get back to building big systems again.  So anyway, that's what I got for now, like i said, it's a pretty specific case, but I imagine i can't be the only person who's ever run into this.  Hopefully this helps.

        Hope someone found this useful, next up, some thoughts on SoftKinetic and the iisu SDK...Stay Tuned!